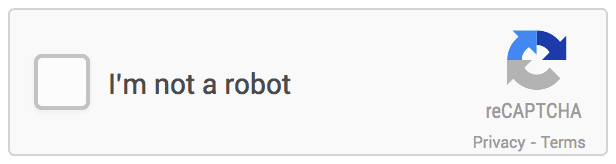
Google reCAPTCHA V2 "I'm not a robot" Checkbox
reCAPTCHA by Google is a free service that protects your website from spam and abuse. It's designed to be friendly to humans, much more friendly than image-based CAPTCHA. It uses advanced risk analysis techniques to tell humans and bots apart to protect your website from spam.
The "I'm not a robot" checkbox requires the user to click a checkbox indicating the user is not a robot. This will either pass the user immediately (with No CAPTCHA) or challenge them to validate whether or not they are human.
Get started
To get started with reCAPTCHA you must first have a Google account. Once you are logged into Google go to https://www.google.com/recaptcha/admin to register your new website. The usage of reCAPTCHA is limited to the domains that you register. It's recommended that if you have multiple domains that you register each one separately.
- Label - Give a meaningful, but short name that describes your site.
- reCAPTCHA type - Choose "reCAPTCHA v2" and then choose "I'm not a robot Checkbox".
- Domains - Enter the domain or domains that you plan to use reCAPTCHA on.
- Owners - this should be your Google account email
- Accept the reCAPTCHA Terms of service
- Check off the "Send alerts to owners"
- Click the "Submit" button.
See the Settings documentation on the Google site for more information.
Get the API keys
Once you've registered your site you then need to get the API credentials. reCAPTCHA gives you a "Site Key" and "Secret Key"
You will need to copy those to the Google reCAPTCHA V2 Checkbox configuration page in BranchCMS.
Integrate into BranchCMS
- In BranchCMS click on the "Site Settings" link at the upper right of the administration and then click on "Spam Protection".
- Then click on "Configure reCAPTCHA V2 ("I'm not a robot" Checkbox)".
- Copy the "Site key" value from the Google reCAPTCHA page and paste it into the "Site Key" field.
- Copy the "Secret key" value from the Google reCAPTCHA page and past it into the "Secret Key" field.
Make sure that if either of those values ends in punctuation that you get the punctuation too.
Customize the display
When you're setting up the reCAPTCHA integration you can also configure the display options. These values will be the default display choices for all places that reCAPTCHA is used throughout the site. You can, however, override them with each form that uses reCAPTCHA.
Integrate with your form
Now that reCAPTCHA is setup for your site you can use it on your forms. By default CAPTCHA is disabled on all forms. To enable it edit the form and go to the CAPTCHA tab.

Choose "Google reCAPTCHA V2 Checkbox" for the "CAPTCHA Type" field. That will show you the status of the reCAPTCHA integration and allow you to customize the display settings for the form.
If you want to customize the display settings for that form choose "Customize the display settings" for the "Display settings" field.
Output the CAPTCHA in the template
Place the following variable tag in your template where you want the reCAPTCHA widget to show:
{{ form.captcha.tag }}
Testing for CAPTCHA type
You may want to use some logic to display the reCAPTCHA in your templates if there is a chance that a different type of CAPTCHA could be chosen.
The reCAPTCHA V2 Checkbox CAPTCHA type is designated by the "recaptcha" value for the form.captcha.type variable.
{% if form.captcha.type == 'recaptcha' %}
   {# Display the Google reCAPTCHA V2 Checkbox here #}
   <p>Click the checkbox before submitting the form.</p>
   {{ form.captcha.tag }}
{% endif %}
Customizing in your templates
The simplest way to display the CAPTCHA in your forms is to simply use the {{ form.captcha.tag }} variable in your template. That will output the <div> tag and <script> tag necessary for the CAPTCHA.
You can, however, customize the reCAPTCHA HTML and use your own Javascript to render the reCAPTCHA if you need more control. More information can be found on the Google reCAPTCHA documentation page.
Set custom attributes on the <div> tag
{# Set the "id" attribute on the div tag #}
{% set form.captcha.id = 'myId' %}

{# Set the "data-sitekey" value #}
{% set form.captcha.data.sitekey = 'siteKeyValueHere' %}

{# Set the "data-theme" value #}
{% set form.captcha.data.theme = 'dark' %}

{# Set the "data-size" value #}
{% set form.captcha.data.size = 'compact' %}

{# Set the "data-tabindex" value #}
{% set form.captcha.data.tabindex = 3 %}

{# Set the "data-callback" value #}
{% set form.captcha.data.callback = 'callbackFunction' %}

{# Set the data-expired-callback value #}
{% do form.captcha.data.set('expired-callback', 'myExpiredCallback') %}

{# Set the data-error-callback value #}
{% do form.captcha.data.set('error-callback', 'myErrorCallback') %}
Customizing the Javascript URL request
If you're customizing the reCAPTCHA display you may need to add the supported URL parameters to the Javascript file request.
{% set form.captcha.js.src = form.captcha.js.src ~ '?onload=onloadCallback&render=explicit' %}Instead of outputting the <div> tag and the script you may want to customize the HTML you output and just display the script tag. By default the script tag to load the reCAPTCHA Javascript file has the async and defer attributes set.
<div class="myCustomCaptcha"></div>
{% set form.captcha.js.src = form.captcha.js.src ~ '?onload=onloadCallback&render=explicit' %}

<script>
function onloadCallback() {
    grecaptcha.render(document.querySelector(".myCustomCaptcha"), {
       'sitekey' : '{{ form.captcha.data.sitekey }}',
       'size': 'compact',
       'theme': 'dark'
    });
}
</script>
{{ form.captcha.js.tag }}
The above code will output:
<div class="myCustomCaptcha"></div>
<script>
function onloadCallback() {
grecaptcha.render('html_element', {
'sitekey' : '{{ form.captcha.data.sitekey }}',
'size': 'compact',
'theme': 'dark'
});
}
</script>
<script src="https://www.google.com/recaptcha/api.js?onload=onloadCallback&render=explicit" async="" defer=""></script>