Add/Edit Form Settings
Add and Edit form settings allow you to control who can add and edit items within your app, as well as whether an item added has to be approved by an administrator first. An optional notification email can be sent to the user that submitted the form to alert them that their content has been approved and published.
Adding Items
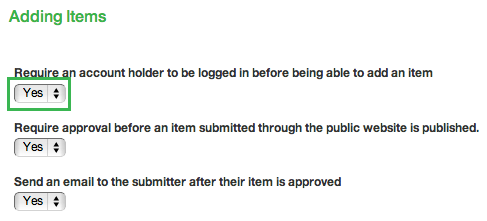
The Adding Items controls who can add items, whether the items need to be approved, and whether the user gets an email notification when their item is approved.
To require a user to be logged in to submit an item, select Yes from the select men under Require an account holder to be logged in before being able to add an item.
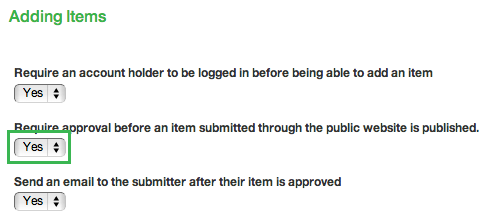
If items need to be approved before they show on the site, select Yes from the select menu under Require approval before an item submitted through the public website is published.
If you want the user to receive an email notifying them that their item has been approved, select Yes from the select menu under Send an email to the submitter after their item is approved.
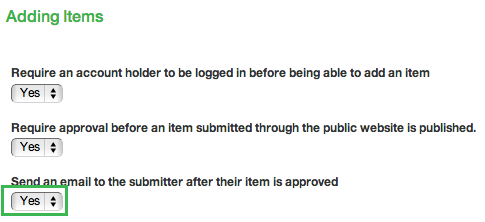
Choosing Yes shows more fields that allow you to configure how to get the email address that the notification is being sent to, as well as the email's name, address, subject, and content.
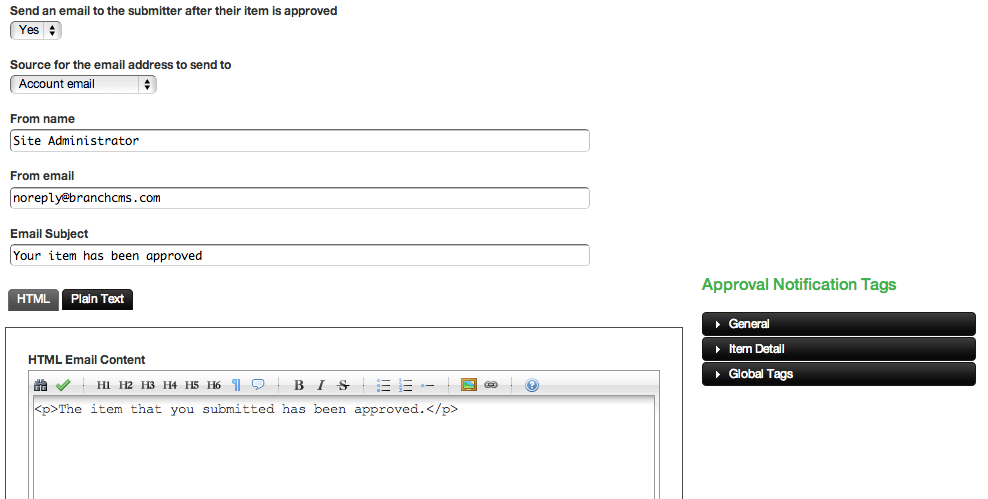
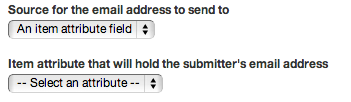
The notification email will be sent to the email address of the account that submitted the item. It can also pull the email address from a field within the form. To do this, select An item attribute field from the select menu under Source for the email address to send to. This will show another select menu that you can use to pick an attribute from the form to use for the email address.
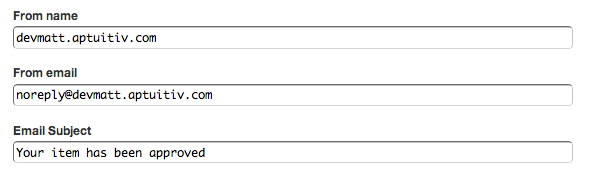
Set an email subject, name, and address in their respective fields. A "noreply" type of email address is common.
Format the email in HTML or Plain Text using the editors in below the text fields. The Plain Text format has its own editor in the Plain Text tab. Branch code can be used in the email to pull information from the form submission into the email content.

The process for setting up the email content is very similar to creating a content template. View the documentation on content templates for more information.