Banners
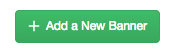
The banners are the actual advertisements that will be placed on your website. To add a Banner, click the + Add a New Banner button.
To edit an existing banner, select the banner name under the field labeled Advertiser name.

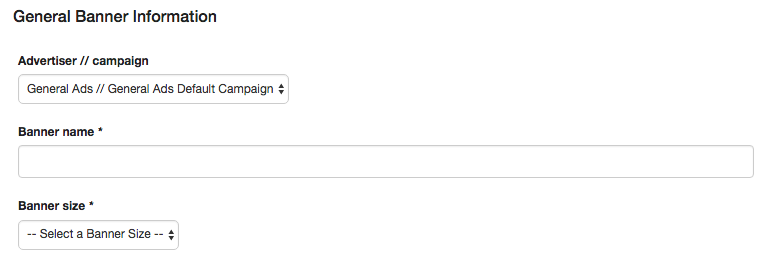
Upon pressing the + Add a New Banner button, you will be brought to a window where you may enter the Advertiser // Campaign the Banner Name and the Banner Size.
After completing each of these fields either click Save Banner to save your banner and return to the main banner tab, Save & Add Another to save your current banner and make anew one, or Cancel to cancel your changes.

After completing this, return to the Banner tab and select your banner name in the same way that you would to edit an existing banner.
Here, you may edit your banner further.
The General Banner Information you have already entered, but you may change it here if needed.
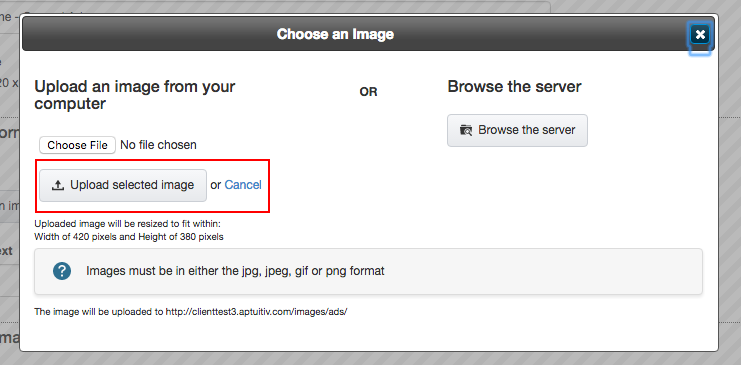
Under Image Information, you can add the image to your ad. To add an image, click choose an image.
The pop up window will allow to do two things: Upload an image from your computer, or Browse the server.
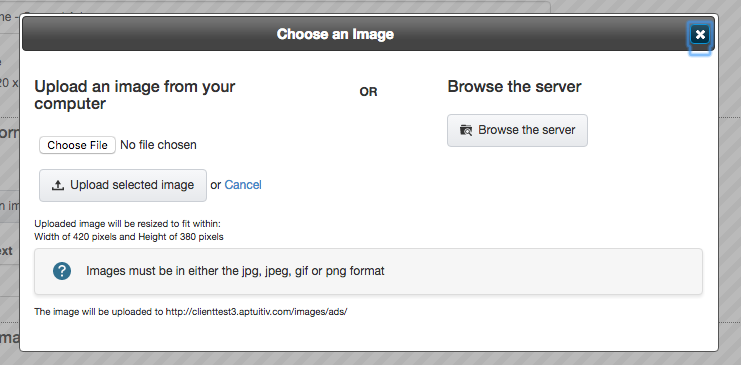
To upload an image from your computer, click Choose file.
Select the image you want to add though your computer, and press the Upload selected image button.
Browsing the server allows you to select an image from the file browser. For more information on the file browser and how to use it, go to the [LINK] file browser documentation page.
To remove an existing banner image, or to edit the banner image, click the edit attributes/remove button.
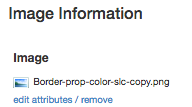
Here you may edit additional information such about the banner image, or remove the image using the edit attributes / remove link.
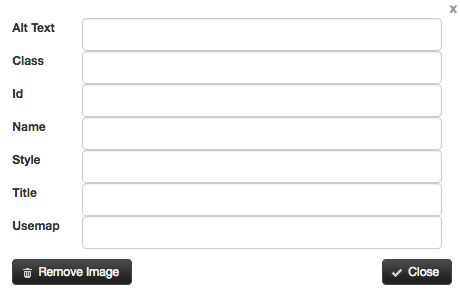
The Image alt text field allows you to input a detailed description of the add in case the browser does not load the image.

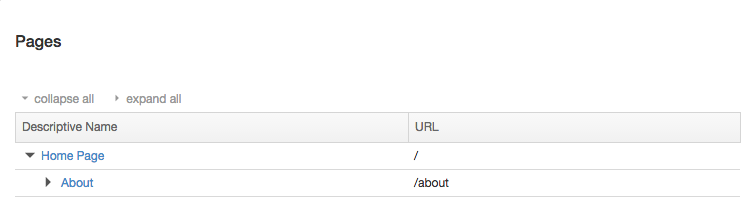
Under link information, you can change the url the banner takes a user to upon clicking. You may enter the URL manually, or click the browse button on the side of the field to bring up a browser to the pages on your site.

In the pop up browser, select the name of the page you want the ad to link to.
The link target field allows you to change the destination of the link upon clicking the ad. Select the arrows to dropdown the menu and select your desired destination.

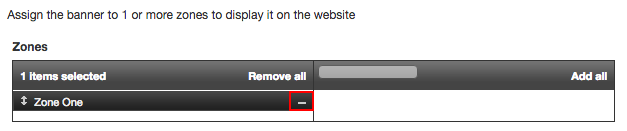
Zones is where you choose which zone each banner is placed within your page.
To choose the zone you wish the banner to be assigned to, press the + next to the desired zone in the right column.

To remove a zone press the - button next to the zone name in the left column.