Sometimes when you're working on a new site it can be easier to work on a local site rather then having to FTP files up to a server. If you're on a Mac then here is some basic instructions on how to setup a local website.
To help make it obvious that we're working on a local site we like to use ".dev" as the TLD. In this example we're going to be setting up a local site called "testsite.dev".
Step 1 - Setup the site folder.
I put all my sites in /user/USERNAME/Sites .
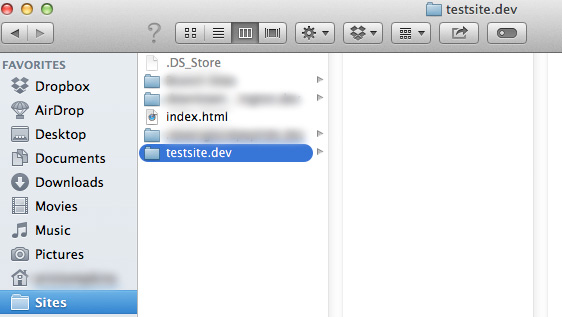
In that folder create a file called "index.html" and enter the following code.
<html>
<head>
<title>Test</title>
</head>
<body>
Site Works
</body>
</html>
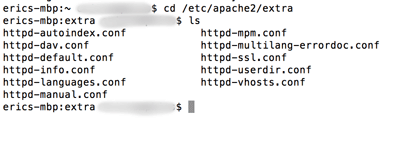
Step 2 - Open up Terminal. Enter the following command.
cd /etc/apache2/extra
Then enter
ls
You should see the following files.
We need to add some information to the httpd-vhosts.conf file. Enter
sudo vi httpd-vhosts.conf
You will need to enter your password.
You will want to enter the following lines. You'll want to change "testsite.dev" for the name of your website. Also, USERNAME should be the name of your user on your mac.
To enter a new line in the editor you will need to press the "i" key.
<VirtualHost *:80>
ServerName testsite.dev
DocumentRoot "/Users/USERNAME/Sites/testsite.dev"
<Directory /Users/USERNAME/Sites/testsite.dev>
AllowOverride All
Order allow,deny
Allow from all
</Directory>
</VirtualHost>
To apply your changes first press ":" then enter "wc" and press enter.
:wc
Step 3 - Add the site to the hosts file.
In order for your browser to know where to load this local domain that does not exist you need to tell your computer where to look. That is what the "hosts" file is for.
In Terminal enter the following command:
sudo vi /etc/hosts
Add a new line to the file. To enter input mode in vi hit the "i" key.
127.0.0.1 testsite.dev
To apply your changes first press ":" then enter "wc" and press enter.
:wc
Step 4 - Restart apache.
First thing that we'll want to do is to confirm that everything is setup correctly.
In Terminal enter the following command.
apachectl configtest
You should get the following output:
Syntax OK
You may need to prefix the command with "sudo" if you get any permission errors.
sudo apachectl configtest
If you don't get "Syntax OK" then you should review the previous steps and fix any issues.
If everything is ok then enter the following command.
sudo apachectl -k restart
Step 5 - Load the local site in the browser.
Open your browser and enter "http://testsite.dev". The "http://" part is important otherwise depending on your browser it might try to search for "testsite.dev".
You should get the index.html page that you added in step 1 and see the text "Site Works".