Quickbooks Integration
Quickbooks Integration allows you to import web sales to either Quickbooks Desktop or Quickbooks Point of Sale. By default it is turned off.
How it works
When the Quickbooks Integration is enabled you have the option of configuring it to integrate with Quickbooks Desktop or Quickbooks Point of Sale.
You also have the option to automatically download to quickbooks or manually download to quickbooks.
Orders which have not been downloaded into Quickbooks can be manually scheduled for download from the Orders or Order Detail pages.
If inventory levels are being tracked on your website, they can be synchronized with Quickbooks or Quickbooks Point of Sale.
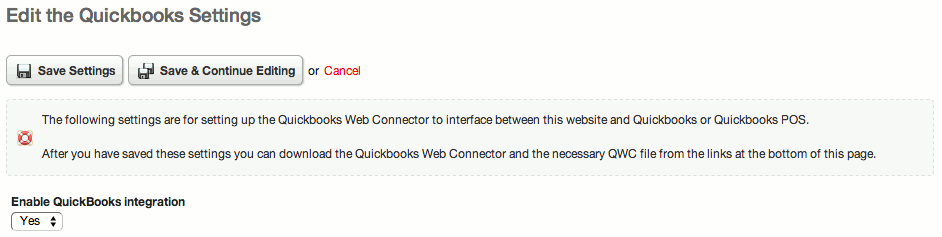
Setting up Quickbooks Integration
To set up Quickbooks Integration go to the Settings part of the Store app. Then click on the Quickbooks Integration link.
At the top of the page you'll see the option for enabling and configuring Quickbooks Integration.
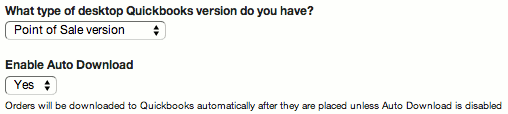
If you enable Quickbooks Integration then you may select which version of Quickbooks (Regular or Point of Sale) you are using.
You may also choose whether you would like Auto Download enabled.
When Auto Download is enabled, new orders will be automatically downloaded into Quickbooks the next time the web connector synchronizes.
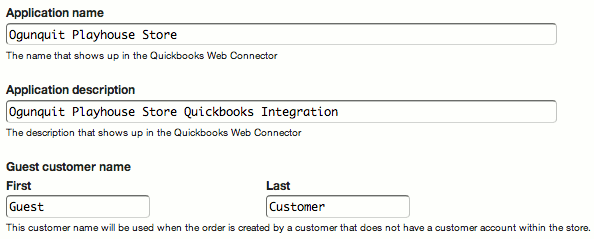
Web Connector Settings
You may modify 'Application Name' and 'Application Description' or use the default values. These labels are displayed in the Quickbooks Web Connector.
You may also modify 'Guest Customer Name' or use the default value. This name will be used for orders which are not associated with a customer account.
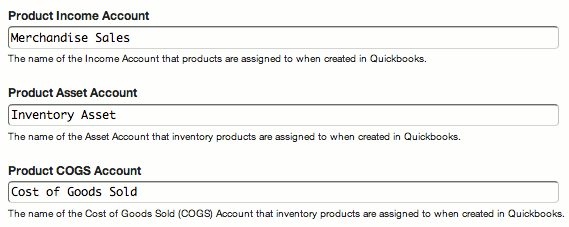
Product Account Settings
These settings are used when products need to be created in Quickbooks. The accounts should already exist in your Quickbooks file.
If you are integrating with Quickbooks Point of Sale, Product Account Settings are only relevant if Point of Sale is configured to be used with Regular Quickbooks.
Inventory Levels Syncing
When inventory levels are updated for your products in Quickbooks you can have the inventory level on the website automatically updated.
![]()
Inventory levels are synchronized each time the Web Connector runs unless they have already been synchronized within the last two hours.
Inventory updates could come from manual updates or from sales done in Quickbooks.
Regular Quickbooks Only Settings
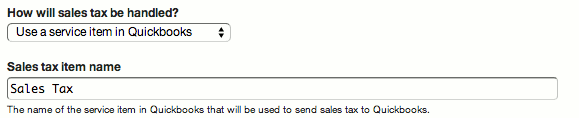
With Regular Quickbooks you have the option of using a service item to handle sales tax rather than having Quickbooks calculate the sales tax.
You may specify the name of the service item in Quickbooks that will be used for sales tax, as well as the income account that the sales tax will be assigned to.
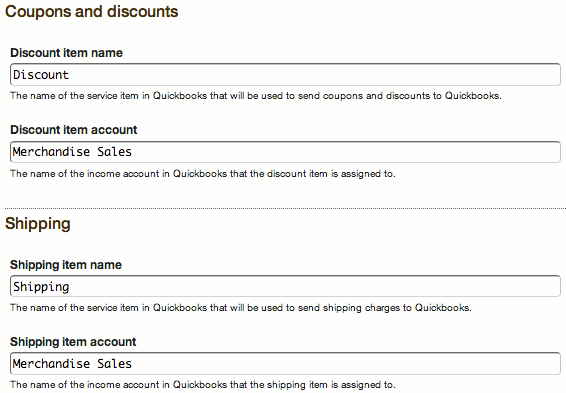
You may also specify the item name and income account to use for Discounts and Shipping Charges.
Point of Sale Only Settings
When integrating with Quickbooks Point of Sale, you may specify 'POS Workstation Number'.

Sales Receipts will be imported to the specified Workstation Number.
It is recommended that you choose a unique workstation for sales that come from your website to easily separate website sales from other sales.
Set Up Web Connector
IMPORTANT - You must have an SSL certificate enabled on your website in order to integrate with Quickbooks. This is because the Quickbooks Web Connector software has to connect to a secure URL.
Step 1 In order for your website to connect to Quickbooks you need to download the Quickbooks Web Connector.
Step 2 After you have installed the Quickbooks Web Connector and updated the settings above, download the QWC file to add to the Web Connector. The QWC file is provided at the bottom of the Quickbooks Integration Settings page.
Step 3 After you have added the QWC application file to the Quickbooks Web Connector you will need to set the password in Quickbooks Web Connector. The password is provided at the bottom of the Quickbooks Integration Settings page.